Hello again everyone! It's Elizabeth here. So a few years ago I had the pleasure of writing a party themed
blog for the company I work with. I had
a lot of fun staging hosting parties and thankfully my awesome
girlfriends were always willing to come over and “party” with me ... even if
they were belligerent shy about being photographed ... ahem ... I won’t
mention names ... they know who they are ... Jane, Polley, Leslie, Kay ... oops
... my bad (insert wicked laugh). Anywho, one day as I was driving around town
I came up with a very random party theme ... DIPS. All dips. All the time. Nothin’ but dips. So a few weeks later, the girls were back over
at my house for another round of festivities. The pix below show off the
details.
But before we start ... a caution and a disclosure. First,
my food photography skills are non-existent so no judging on how bad the pix
are. My new camera lens will make a huge improvement next time for that reason
alone, but I promise for future posts to work on gaining some actual
photography how-to knowledge. Second, these pix were never used for the above mentioned
blog. This content is all new just for you dear reader! I was released from my blogging duties before
I had the chance to share this “party” so these pix have been collecting
digital dust for over two years just waiting for a reason to be posted. Yay for
today!
Naturally the word “DIP” lead me to think of street signs (work
with me ... my brain tangents quickly) so of course I had to use yellow caution
signs as the primary party décor element. Guests were greeted at the front door with an
introduction to this theme and the mantle got a simple banner further cautioning guests to be ready for deliciousness.
The color scheme of black, white and yellow carried through
all the other party elements and makes for a very high contrast and graphic
statement. Love it! Now ... before you ask ... yes ... I can do
parties in other color schemes. Just because the only two you’ve seen here just
happen to be black, white and yellow, doesn’t mean I can’t do other
colors. I like pink, black and white too.
LOL.
Muti-tiered serving pieces add visual interest and help to
save space. If you don’t have some, make
some. I. Do. All. The. Time. I layer cakes
stands. I put platters on top of upside down bowls. Get creative ... layers make a huge
difference in your tablescapes. If
nothing else they give you more surface space and table top real estate is
always at a premium.
One of my most favorite party décor tricks comes in a roll. A
gift wrap roll. Unroll gift wrap down the center of your table for an easy
table runner. Great way to add color and
to cover up those cheap, thin dollar store plastic tablecloths I always use ...
yes, I’m cheap that way.
Napkin wraps were the perfect place to add more yellow
caution signs and have a little fun with a pun ... heeheehee. The “centerpiece” was actually three elements
... two handmade signs (“One Way To Yum”) and an apothecary jar (another must
have in your party serving ware stash) filled with yellow (um, duh!) lemons.
So by now you are probably wondering what was served at this
“DIPS. All dips. All the time. Nothin’ but dips.” party. Well ... there were ... wait for it ... dips!
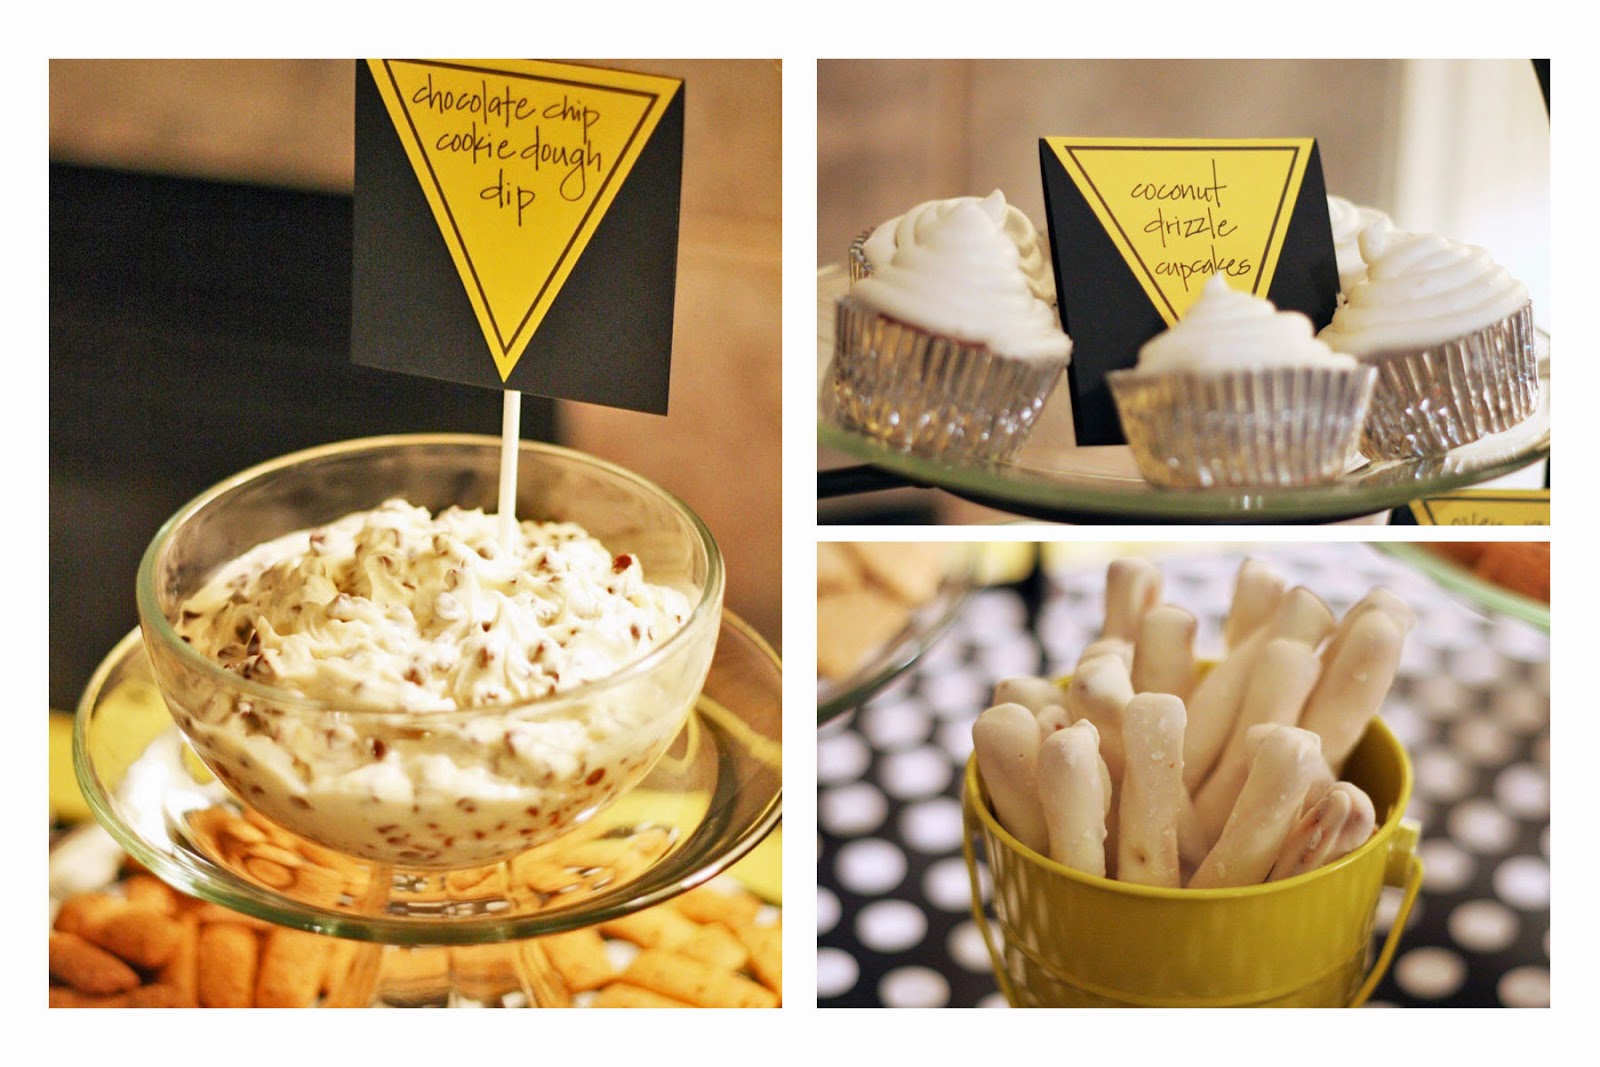
Surprise! There were sweet dips:
Chocolate Chip Cookie Dough Dip with Graham Crackers; Coconut Drizzle Cupcakes
... what? Kay ... did you bring those?
... always a rebel bucking up against the “rules”; Yogurt Dipped Pretzels (see
what I did there ... dipped pretzels ... l know, it’s a stretch); and Fruit Salsa
Dip with Cinnamon Sugar Tortilla Chips (pictured below). Seriously, why didn’t I have breakfast before
I started writing? Sigh.
There were also savory dips: Loaded Baked Potato Dip with
Oven Fries; Spinach Artichoke Dip with Tortilla Chips; and Cheesey Garlic Dip with Chips (not pictured). Yum. Garlic.
Now ... If I were a better blogger, I’d have links to
recipes ... but alas, I am not that organized.
If I remember correctly, these dips weren’t that obscure to find on the
big wide web, so I’m sure a quick search will yield plenty of options. Get it? Yield. Hahahaha. Ok, I’ll stop with the bad puns now.
Well, I hope you’ve found some inspiration here! Enjoy indulging
in an evening of dips with friends ... it’s sure to be all the talk on the street
: ).
Ok ... seriously ... why can't I get those three above paragraphs left-justified? Ugh. I'm just so technologically inept. Well ... I tried ... just love me for my flaws and all : ).