Showing posts with label Party Decor. Show all posts

Thursday, May 1, 2014

Caution: Dip Ahead


Hello again everyone!  It's Elizabeth here. So a few years ago I had the pleasure of writing a party themed blog for the company I work with.  I had a lot of fun staging hosting parties and thankfully my awesome girlfriends were always willing to come over and “party” with me ... even if they were belligerent shy about being photographed ... ahem ... I won’t mention names ... they know who they are ... Jane, Polley, Leslie, Kay ... oops ... my bad (insert wicked laugh). Anywho, one day as I was driving around town I came up with a very random party theme ... DIPS.  All dips. All the time. Nothin’ but dips.  So a few weeks later, the girls were back over at my house for another round of festivities. The pix below show off the details.


But before we start ... a caution and a disclosure. First, my food photography skills are non-existent so no judging on how bad the pix are. My new camera lens will make a huge improvement next time for that reason alone, but I promise for future posts to work on gaining some actual photography how-to knowledge. Second, these pix were never used for the above mentioned blog. This content is all new just for you dear reader!  I was released from my blogging duties before I had the chance to share this “party” so these pix have been collecting digital dust for over two years just waiting for a reason to be posted. Yay for today!


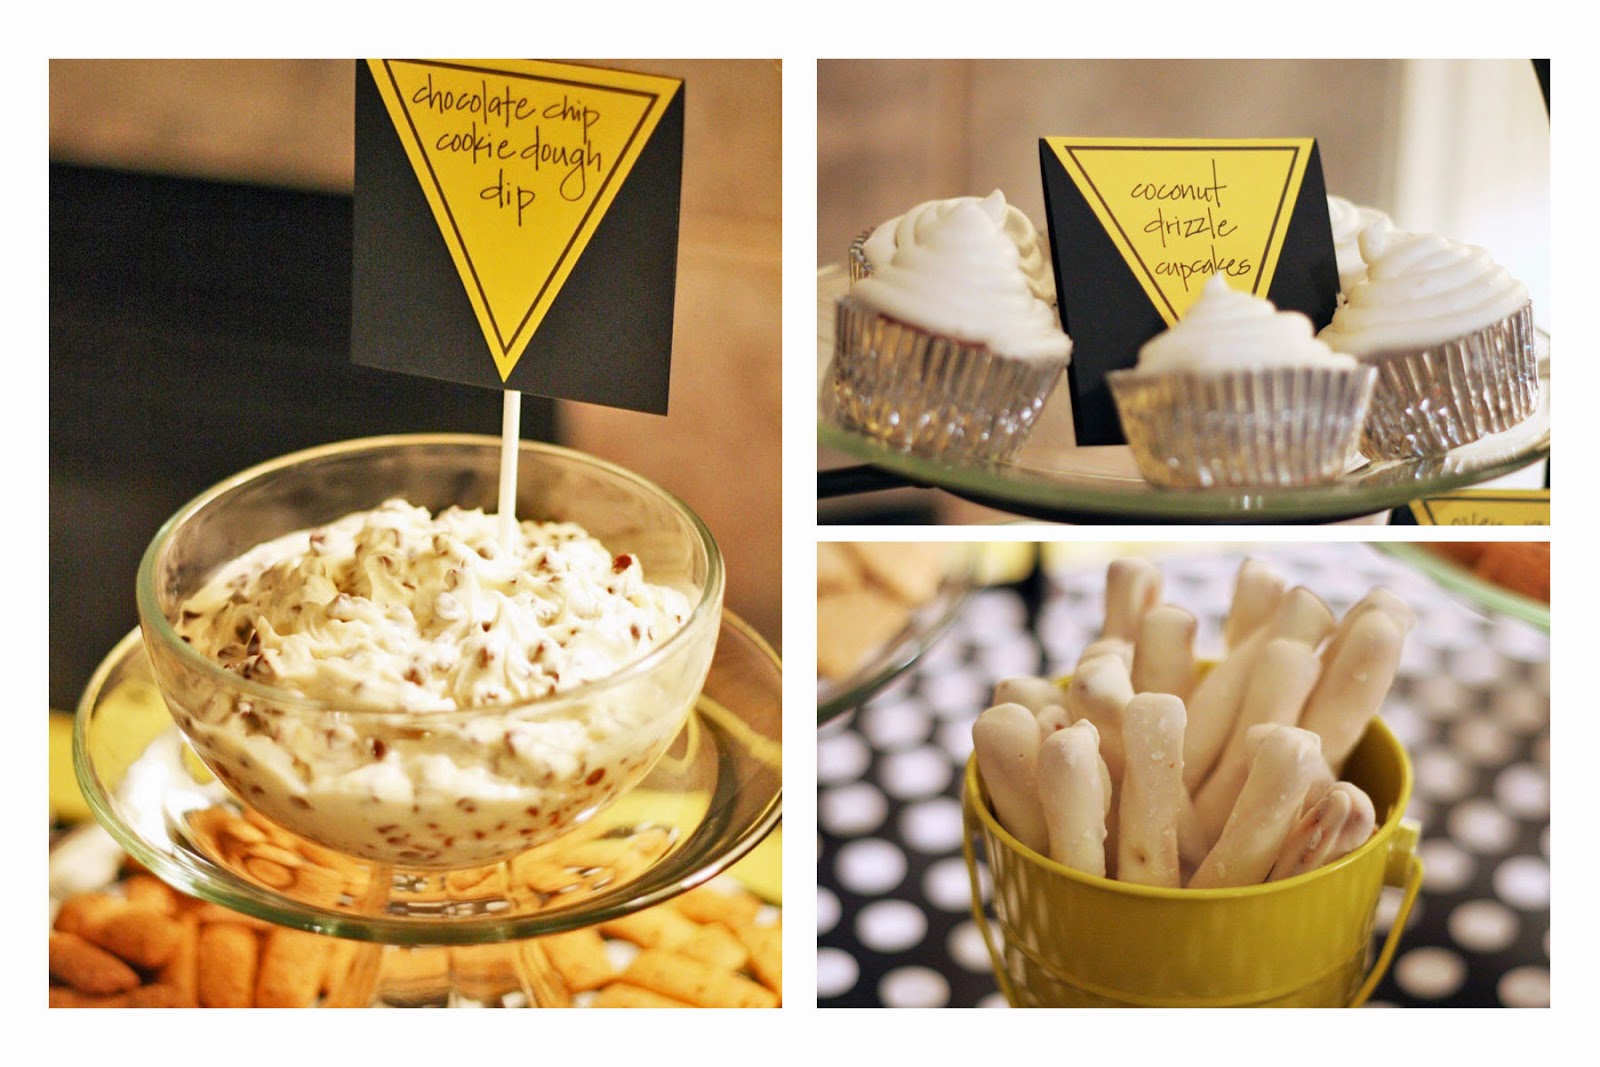
Naturally the word “DIP” lead me to think of street signs (work with me ... my brain tangents quickly) so of course I had to use yellow caution signs as the primary party décor element. Guests were greeted at the front door with an introduction to this theme and the mantle got a simple banner further cautioning guests to be ready for deliciousness.


The color scheme of black, white and yellow carried through all the other party elements and makes for a very high contrast and graphic statement.  Love it!  Now ... before you ask ... yes ... I can do parties in other color schemes. Just because the only two you’ve seen here just happen to be black, white and yellow, doesn’t mean I can’t do other colors.  I like pink, black and white too. LOL.


Muti-tiered serving pieces add visual interest and help to save space.  If you don’t have some, make some.  I. Do. All. The. Time. I layer cakes stands. I put platters on top of upside down bowls.  Get creative ... layers make a huge difference in your tablescapes.  If nothing else they give you more surface space and table top real estate is always at a premium.


One of my most favorite party décor tricks comes in a roll. A gift wrap roll. Unroll gift wrap down the center of your table for an easy table runner.  Great way to add color and to cover up those cheap, thin dollar store plastic tablecloths I always use ... yes,  I’m cheap that way. 


Napkin wraps were the perfect place to add more yellow caution signs and have a little fun with a pun ... heeheehee.  The “centerpiece” was actually three elements ... two handmade signs (“One Way To Yum”) and an apothecary jar (another must have in your party serving ware stash) filled with yellow (um, duh!)  lemons.  


So by now you are probably wondering what was served at this “DIPS. All dips. All the time. Nothin’ but dips.” party.  Well ... there were ... wait for it ... dips! Surprise!  There were sweet dips: Chocolate Chip Cookie Dough Dip with Graham Crackers; Coconut Drizzle Cupcakes ... what?  Kay ... did you bring those? ... always a rebel bucking up against the “rules”; Yogurt Dipped Pretzels (see what I did there ... dipped pretzels ... l know, it’s a stretch); and Fruit Salsa Dip with Cinnamon Sugar Tortilla Chips (pictured below).  Seriously, why didn’t I have breakfast before I started writing?  Sigh.


There were also savory dips: Loaded Baked Potato Dip with Oven Fries; Spinach Artichoke Dip with Tortilla Chips; and Cheesey Garlic  Dip with Chips (not pictured).  Yum. Garlic. 


Now ... If I were a better blogger, I’d have links to recipes ... but alas, I am not that organized.   If I remember correctly, these dips weren’t that obscure to find on the big wide web, so I’m sure a quick search will yield plenty of options.  Get it? Yield. Hahahaha.  Ok, I’ll stop with the bad puns now.


Well, I hope you’ve found some inspiration here! Enjoy indulging in an evening of dips with friends ... it’s sure to be all the talk on the street : ).


Ok ... seriously ... why can't I get those three above paragraphs left-justified? Ugh. I'm just so technologically inept.  Well ... I tried ... just love me for my flaws and all : ).


signature

Wednesday, June 26, 2013

Congrats Grad!


Helloooo everyone!  

Elizabeth here with this week’s crafting journal entry and I'm super excited because it's my very first one! So wish me luck ; ) ...


Two weeks ago we had the pleasure of celebrating my son’s graduation from high school and much to the boy’s protest, his dad and I threw a party to honor him and his accomplishment.


OK wait ... truth time ... the party ... it was really for me ... for me and all the fun Pinterest ideas I had been pinning for the last six months. Graduation? ... it was just an excuse : ).


But before I go any farther, I must give a shout out to my friend Jane.  She is my creative accomplice in all my party crimes. Thank you Jane for your help in pulling this special day off!  Couldn’t have done it without ya and wouldn’t have wanted to either!  OK, mushy stuff taken care of ... now ... on to the details!


Party guests were first greeted by a balloon lined walk. Golf tees made the execution of this detail easy. The wind, not so much. 


To lessen prep-time, I beefed up a pre-made sign for the front door ... also known as the “making things work at 3AM the night before so that I can catch a few hours of sleep” scenario.


The guest book table showcased a picture of the graduate, a discount-store card box and a fabric banner with matching tablecloth.  In lieu of a traditional guest book, I created a photo book (from one of those on-line sites) featuring school pictures from all thirteen years. Many guests not only signed the book, but also left sweet messages of congratulations or “I remember when ...” stories.  I know the graduate will cherish this book for years to come ... well, that is if I ever let him have it for keeps : ).


This console table got a few quick and easy framed art pieces that I whipped up using scraps of pattern paper and glitter cardstock. A few senior pictures and a stuffed tiger (the school’s mascot) complete the décor and add a touch of whimsy.


I love to seasonally accessorize the tops of the bookshelves in my family room.  The bookshelves are large though and therefore require big decorative pieces.  One of my favorite ways to fill and balance the space is to use ginormous paper mache letters.  I can customize their color with spray paint and can spell whatever word or words my budget will allow. Budget saver tip: choose words with the same letters ... GRAD ... DAD ... MAD ... you get the idea : ).


The other set of bookshelves got topped with dollar store frames filled with a hand-cut message, vinyl numbers applied to a black canvas (yes, it came black ... no painting required) and my leftover spring branches that I was too lazy to take down and find a home for.  

And ... just to be sure that the graduate was amply embarrassed, I made sure to display each of his school pictures (the good, the bad and the awkwardly gawky) across both bookshelves.  Converting them all to black and white kept the display from being too busy and camouflaged the grainy quality of the digitally scanned photos.


The mantle focused on printables ... my newest most favorite decorative tool.  What I have spent recently on printer ink and white cardstock could be enough to put a dent ... I mean small nick (juuust in case the hubs is reading this) ... in the national debt.  LOL.

I got the subway art here and the light bulb graphic here. The chalkboard background came from here and the decorative wording from this post. This chalkboard print was my very first to design from scratch and I have to say ... I’m addicted ... so don’t be surprised if you see more of them in later posts ... fair warning : ).


The kitchen didn’t require much décor since the food took center stage and was pretty enough. The honeycomb balls and pom poms did however act as a kind of chandelier, filling in that large void of space above the island ... big impact for a few dollars and a few hours. Installation tip: use open paper clips to hang the poms from your kitchen light fixture.


One of my most favorite party decorations sat on the cake table.  It was a picture I took of my son on his very last day of school holding a picture of himself on his very first day of kindergarten. Heavy sigh and sniff, sniff.


Now, I will admit it.  I did take the easy way out with the cake ... yes, that is a Costco cake you see in the picture. I did however try to redeem myself by making a super adorable banner for it ... so when you judge, remember that and not the lack of a homemade confection.  


So there you have it ... a Congrats Grad! party. I hope you've found some inspiration for your next shindig whether it’s for a graduation, an anniversary or even a birthday ... there are plenty of adaptable ideas ... but maybe I am a bit biased : ). 

signature